Post by southernlures on Jul 7, 2012 13:47:32 GMT -5
Fleshing a coon
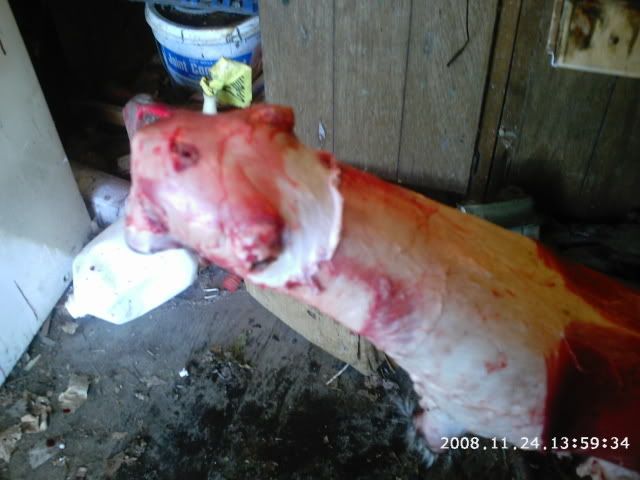
The first pic shows where i have all ready skinned the coon and have set him on my fleshing beam.
The first thing i do is take my small pocket knife which i keep razor sharp. Then once i have the edge sharp enough on the knife i will start under the ears on the hide. I will start shaving down through the cartilage untill i see the hide showing. Then its just a matter of ringing the entire coons neck. I will shave it down about 1 1/2 to 2 inches from the ears.
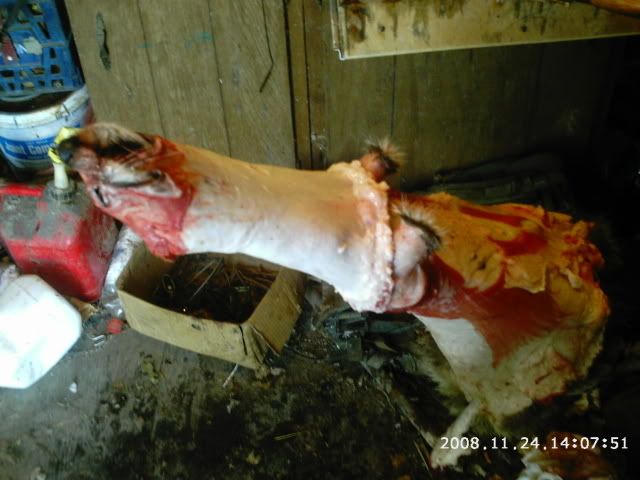
The second pic shows where i will take the fleshing knife and starting at the point where i ended with my pocket knife. I will start to push and shave if i have to to get the flesh and fat to move down the neck to the front shoulder area. The reason for this is if you keep going the skin is real thin in the arm pit area of the front legs. And this will lead to cutting holes as the skin pinches in this area.
The third pic shows where i have reached the arm pit areas. Once at this area i wil take the hide and position the arm holes over the horn of my beam. Once i have the arm hole over the end of the beam. Out comes my pocket knife. I will do to the arm just like i did to the neck. I will ring it and flesh it down taking my time not to cut the hide. Once i have both arm pits ringed and fleshed down the the area i ended up at with my fleshing knife. Then i will cut the flesh that is loose from the arm pits.
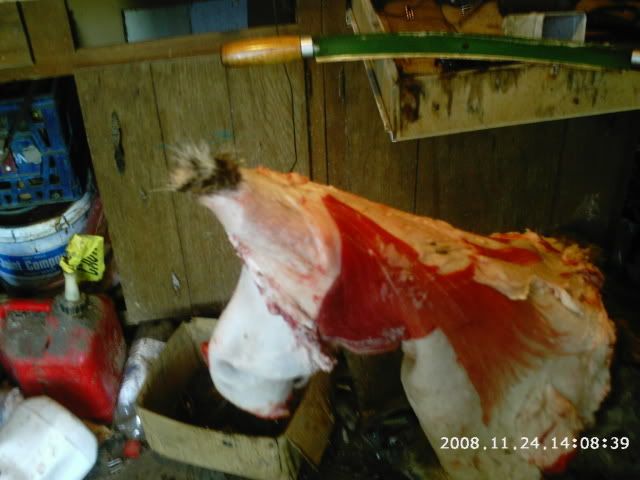
Once we have that cut then we can put the hide on the beam as before. And once we have it set on beam we can continue to flesh the hide. Now we wont have to worry about cutting holes in the pit area. So now thats the hardest part to fleshing.
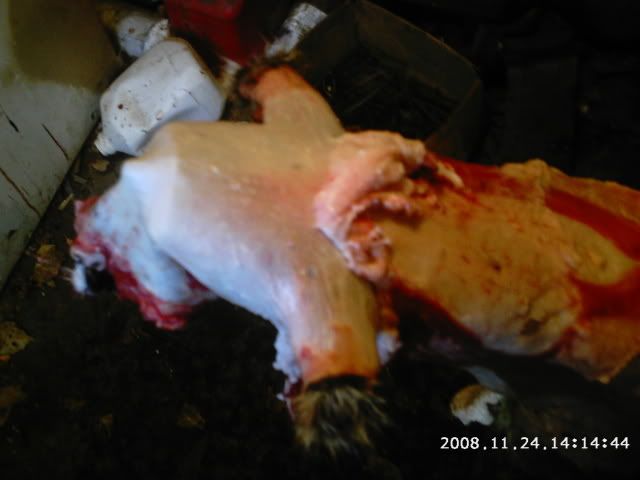
Once we are past the pits its smooth sailing to the tail. Just push and scrap the fat and flesh down the beam as you go. Here is a pic when we are about half way down the hide notice all the fat and flesh is ringing the hide. All the grease and loose fat goes with it keeping the hide nice and clean as we go.
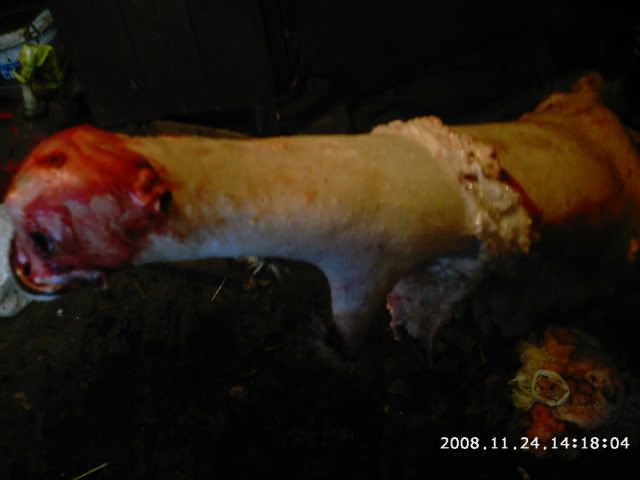
Once you get to the tail split it and flesh the tail gently. As if you use to much pressure you can cut a tail off. So be care full around the tail. Once your done with the tail all the meat and fat and fleshings will be at the bottom of the beam. The hide will be clean and ready to be stretched.
I prefer to use wood but some wire so i will leave that up to your own preferance's.
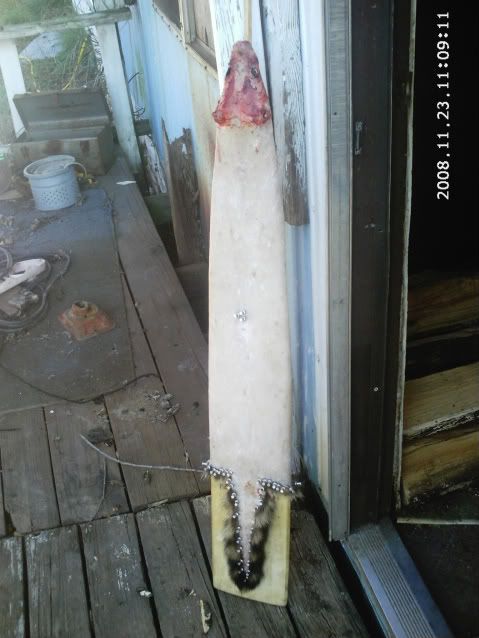
And the finished product will look like this. On wood!!
I hope this has been help full and dont forget to ask any questions you may have!!
The first pic shows where i have all ready skinned the coon and have set him on my fleshing beam.
The first thing i do is take my small pocket knife which i keep razor sharp. Then once i have the edge sharp enough on the knife i will start under the ears on the hide. I will start shaving down through the cartilage untill i see the hide showing. Then its just a matter of ringing the entire coons neck. I will shave it down about 1 1/2 to 2 inches from the ears.

The second pic shows where i will take the fleshing knife and starting at the point where i ended with my pocket knife. I will start to push and shave if i have to to get the flesh and fat to move down the neck to the front shoulder area. The reason for this is if you keep going the skin is real thin in the arm pit area of the front legs. And this will lead to cutting holes as the skin pinches in this area.

The third pic shows where i have reached the arm pit areas. Once at this area i wil take the hide and position the arm holes over the horn of my beam. Once i have the arm hole over the end of the beam. Out comes my pocket knife. I will do to the arm just like i did to the neck. I will ring it and flesh it down taking my time not to cut the hide. Once i have both arm pits ringed and fleshed down the the area i ended up at with my fleshing knife. Then i will cut the flesh that is loose from the arm pits.

Once we have that cut then we can put the hide on the beam as before. And once we have it set on beam we can continue to flesh the hide. Now we wont have to worry about cutting holes in the pit area. So now thats the hardest part to fleshing.

Once we are past the pits its smooth sailing to the tail. Just push and scrap the fat and flesh down the beam as you go. Here is a pic when we are about half way down the hide notice all the fat and flesh is ringing the hide. All the grease and loose fat goes with it keeping the hide nice and clean as we go.

Once you get to the tail split it and flesh the tail gently. As if you use to much pressure you can cut a tail off. So be care full around the tail. Once your done with the tail all the meat and fat and fleshings will be at the bottom of the beam. The hide will be clean and ready to be stretched.
I prefer to use wood but some wire so i will leave that up to your own preferance's.
And the finished product will look like this. On wood!!

I hope this has been help full and dont forget to ask any questions you may have!!
